
At Backbar we know that taking liquor inventory can be a headache, so we created a free bar inventory app to help reduce time spent on bar inventory by up to 66%. We took the traditional spreadsheet thinking and enhanced it to cut hours spent on liquor inventory and track your spending to keep you on budget. Rather you're the general manager overseeing the final numbers or the hourly taking the actual inventory, this isn't information you want to miss.
Manage Bar Inventory and Locations With the Backbar Bar Inventory Software
With this free bar inventory app, you can save time counting, viewing, and analyzing your bar spending. As well as submit liquor orders, access previous orders and track costs all on one software. You provide the spreadsheet of your liquor inventory and we provide you with the opportunity to save time and money with this easy-to-use software.
Easily manage your liquor inventory with software that is similar to spreadsheets but much more fluid and cuts hours of counting. After you have created your account you can get started with our import wizard that will help you to take inventory faster, quickly place and track orders, and better train your staff.

Manage Inventory Locations
Our spreadsheet importer gets all of your liquor into Backbar so you can view your beverage performance, take inventory, and educate your staff with just a few clicks. It will also run reports to show you where you are spending and a summary of inventory based on drink types or locations.
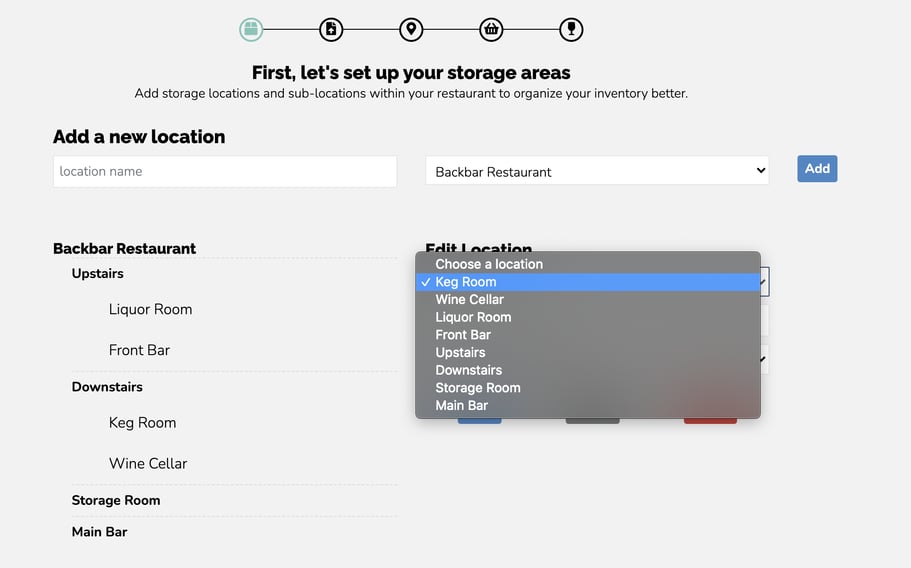
To get started, think about the different locations where you currently count your liquor inventory. If you have different locations on your current spreadsheet, make sure there is an associated location in Backbar created for each one. For example, these could be your upstairs bar, downstairs bar, rooftop/patio bar, or liquor room.
Using Different Locations
Setting up different inventory locations will allow you and your staff to track inventory performance in different locations of your establishment. This is the quickest and most efficient way to improve reporting and inventory analysis and cut down time spent counting inventory when separated by locations.
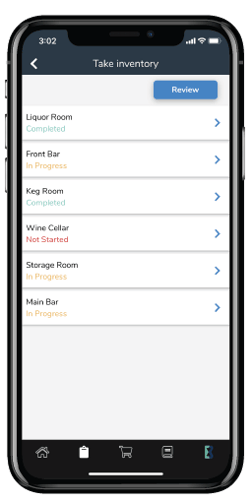
Locations for Mobile
Backbar is also made for mobile so you and your team can spread the workload with coworkers and not be tied to a desk to do inventory. This allows you to do spot-checking for inventory by selecting the location in your bar or restaurant if you do not want to count up all your locations at that time.
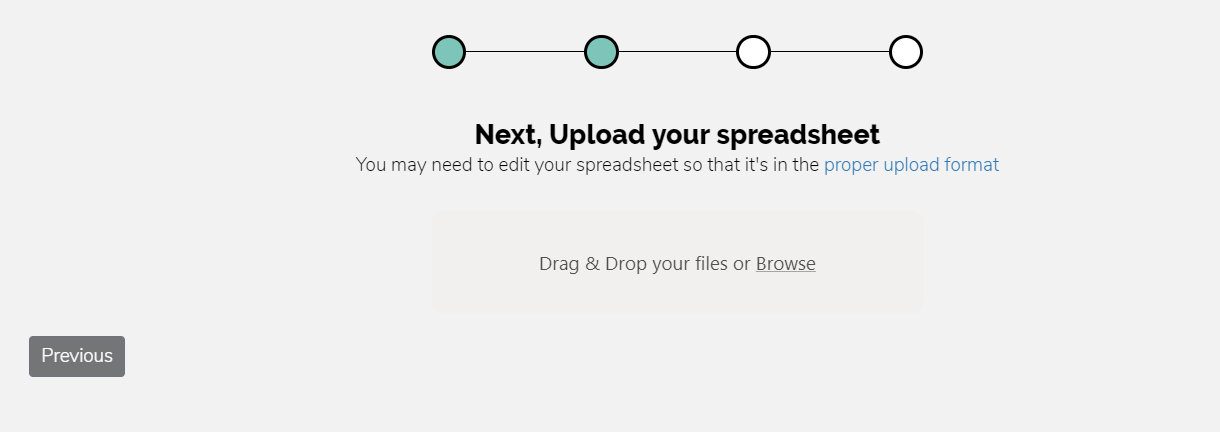
Upload Your Spreadsheet From Excel to Backbar
Once you have chosen your locations you will then upload your spreadsheet. In order to make this process as easy as possible to get your items into Backbar, there are a few requirements:
- Make sure the spreadsheet is in Excel XLSX format
- All data is in the first worksheet
- The first row of the file must contain column headers
- Data does not include merged cells
You can import the following data from your spreadsheet into Backbar
- Name: name of product
- Bin: used for storing/locating the item
- SKU: item identifier for ordering
- Par: inventory quantity needed on-hand
- Cost: cost per unit
- Units per case: number of units that come in a case
- Quantity (in each location): the last counted quantity of the item
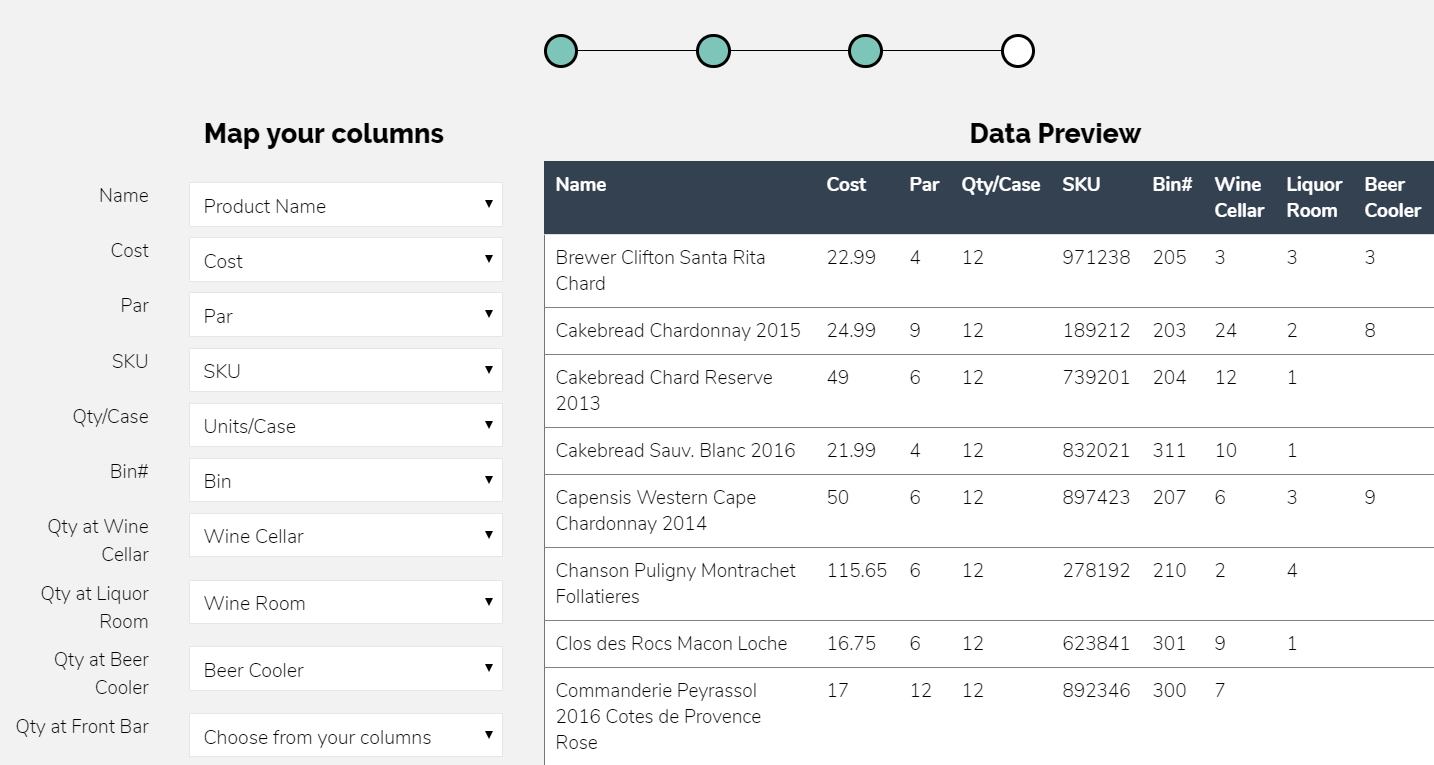
Map Your Column Names
After you have uploaded your spreadsheet, the next step is to match the column names from your spreadsheet to the ones provided in Backbar. On the left, you will select your column name from the drop-down menu that matches with the Backbar name. If you do not have a column for a specific field, then skip selecting it in the drop-down menu. On the right is a preview of your data based on the columns you mapped, if everything looks good you can continue.
Map Your Drinks
Same thing with the columns, you want to make sure all your drinks (spirits, beers, and wines) are mapped to match the respective item in the Backbar database.
The original name from your spreadsheet will show up on the left side and in the middle is the best match by the Backbar database. If an item is a match click the accept button, but if an item should not be imported click skip. In the example below “canned beer” is not a product but rather a category name in the original spreadsheet so you would skip that.
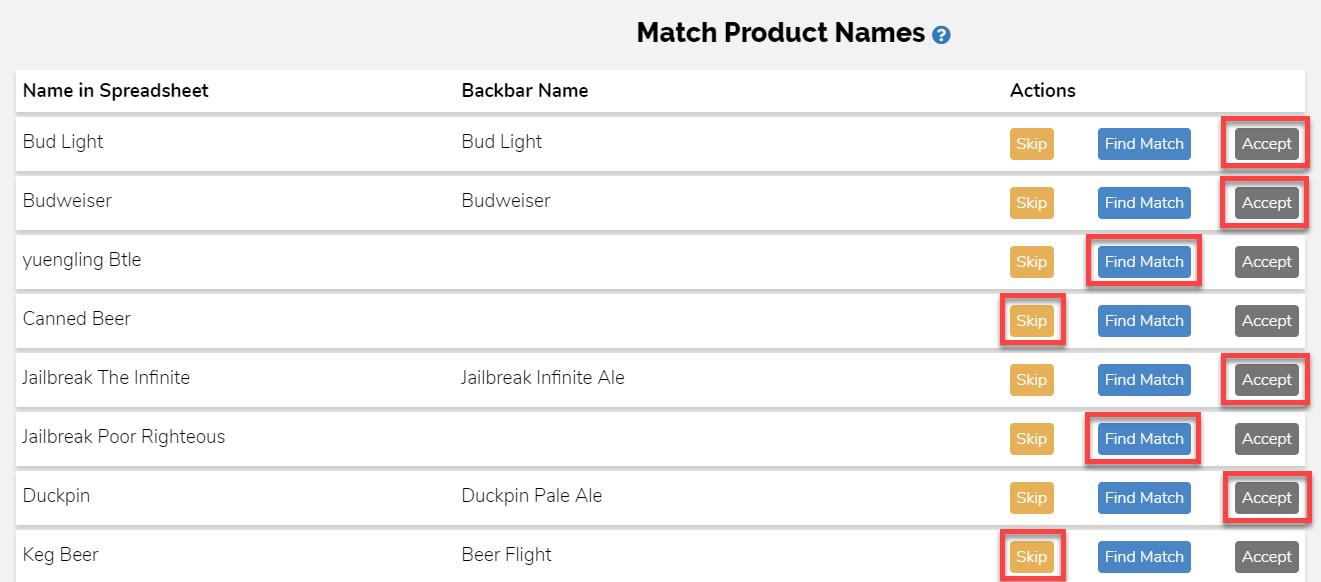
If an item is not a match and is not to be skipped then we need to find a match and it still needs to be added.
If you look at the item yuengling Btle and click find match, a search box will appear.
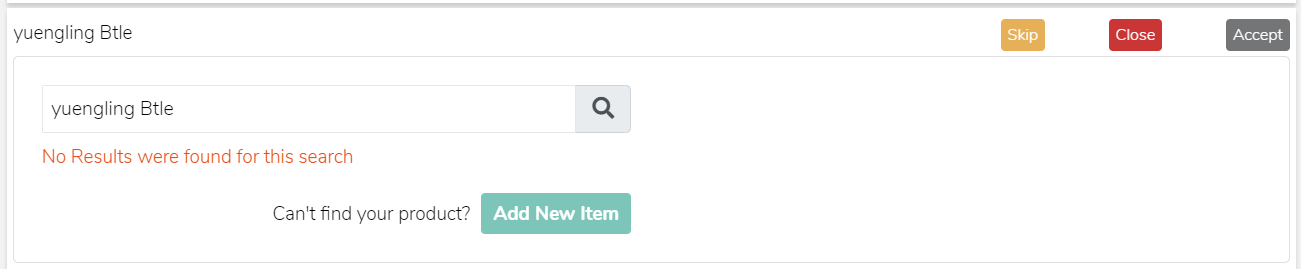
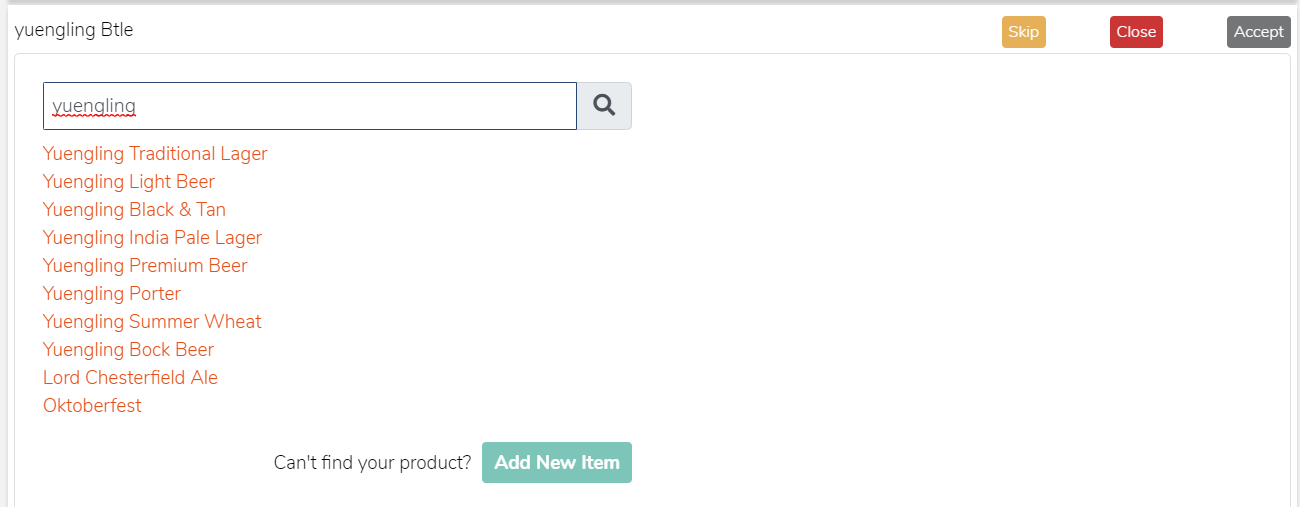
No search results were found so it is best to try to change the search term to find the item. Sometimes abbreviations or shortcuts are taken from the spreadsheet when uploaded so drinks have to be searched to find the match. In this case, we would delete Btle off the end and new search results would appear. Once you find the Yuengling you have it will then be selected as a match.
If we look at the other example of Jailbreak Poor Righteous and search again, no results show.
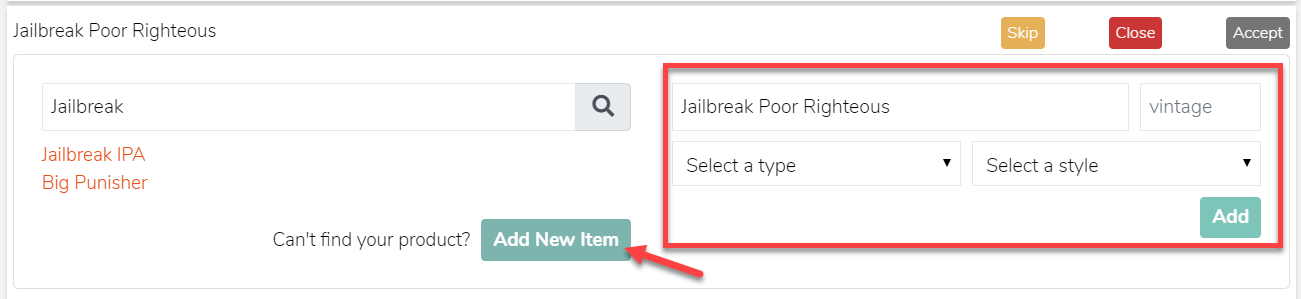
In this example, Poor Righteous is the name of a beer from the Jailbreak Brewing Company. Here you can delete the name and just search for Jailbreak but that does not appear in the results either.
This means it is not in the Backbar database and needs to be entered manually. To do this, click Add New Item and you will then enter the:
- Name
- Vintage (if applicable)
- Drink type
- Style
This same process is done for items that are not wines, beers, or spirits. This could include any mixers or sodas and is the same process to enter manually choosing a different option for type and style.
Taking Inventory With the Backbar App
To begin taking inventory with Backbar, click on the Inventory tab in the navigation panel on the left and click Take Inventory.
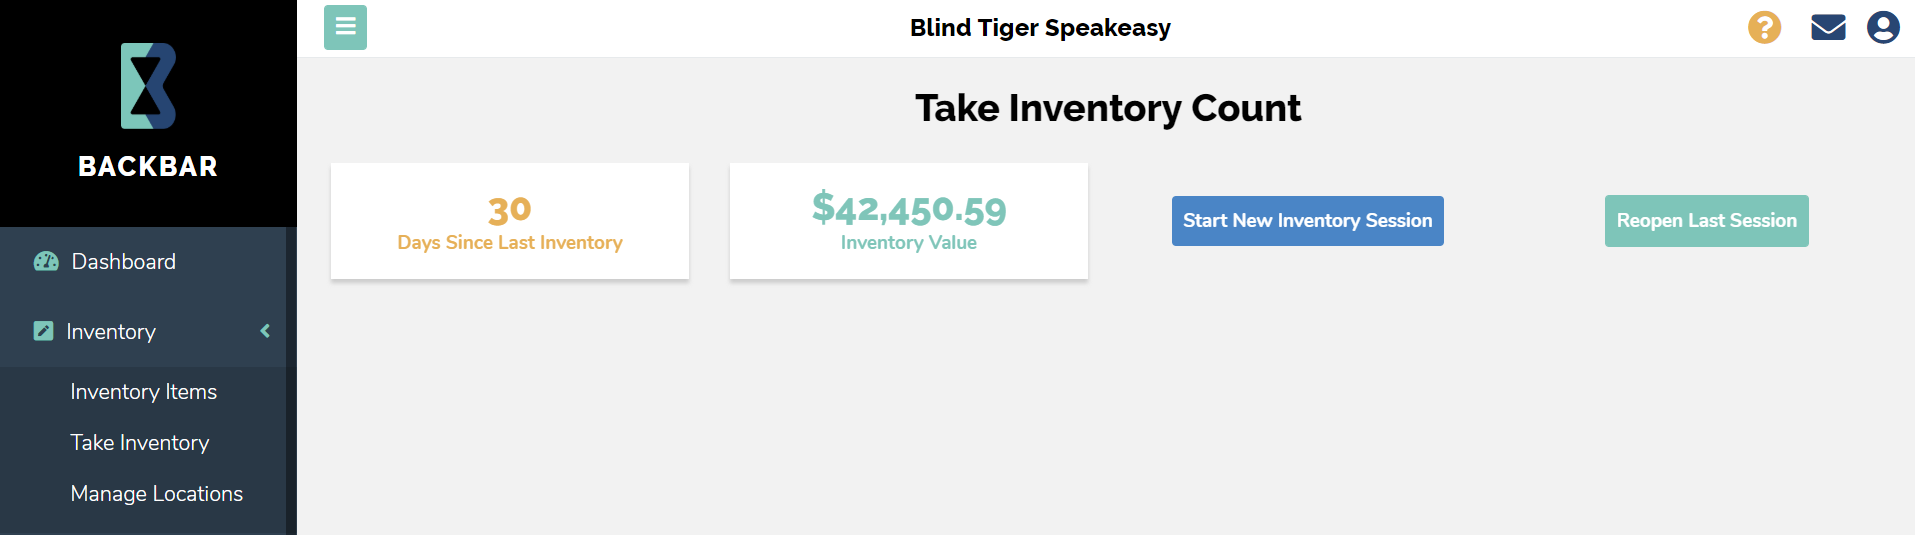
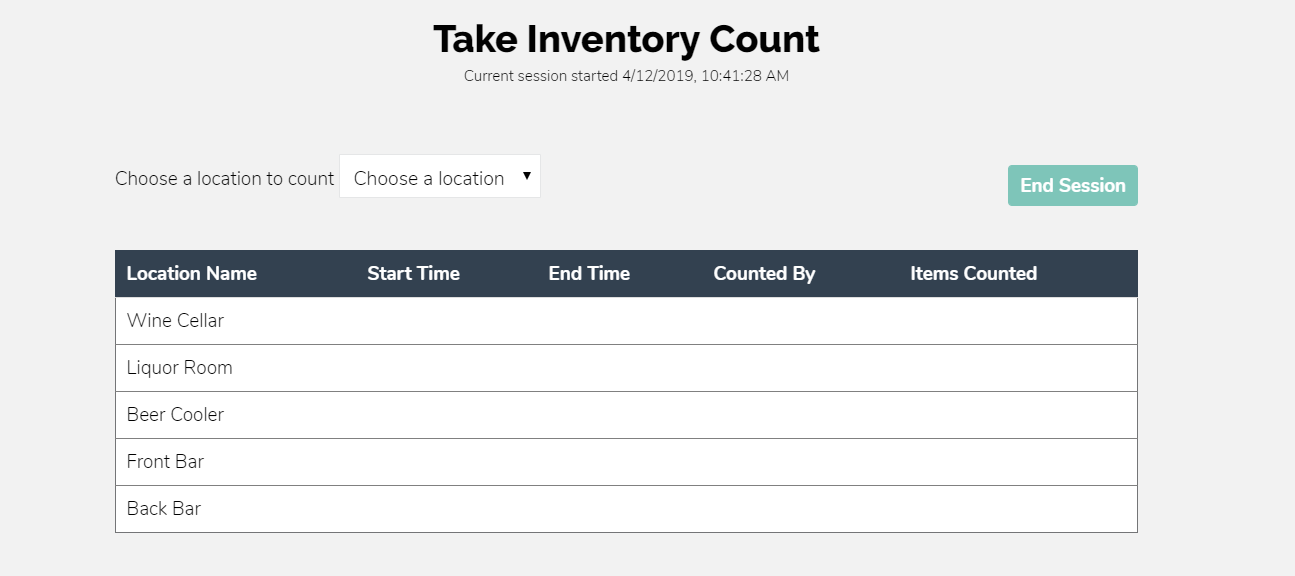
You can either Start a New Inventory Session or Reopen Last Session. When you start a new session, a table of all your inventory locations will appear, begin by choosing the location you want to count.
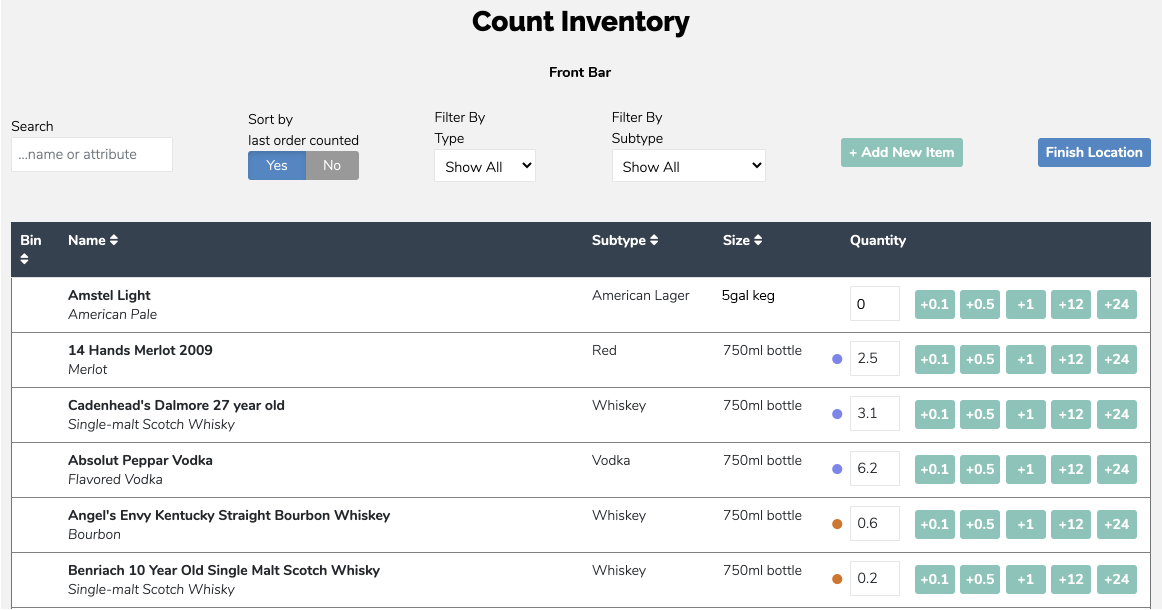
A table of all your items will appear from the location you have chosen. You can filter and sort your inventory items by using the search bar at the top, sort by last ordered count or filter by type or subtype.
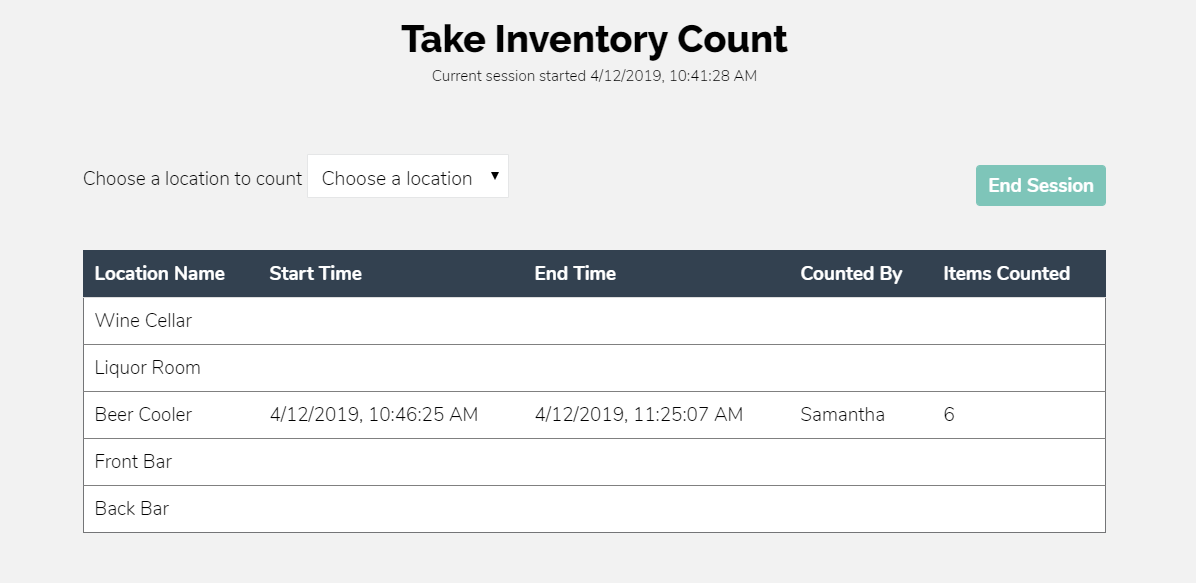
Once you are finished taking your counts hit Finish Location and you will return to the same page as before but now the table will show the times for the location counted and the number of items counted. You can go through and repeat those steps for all your inventory locations and when you are finished hit End Session.
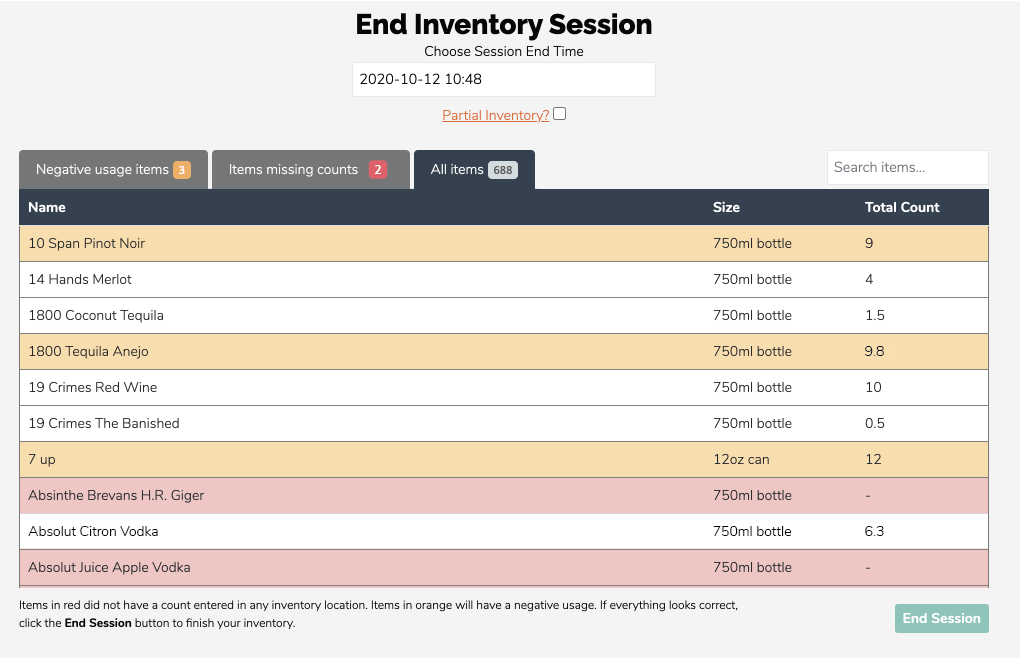
Taking Partial Inventory
When you are taking bar inventory, Backbar assumes you have done a full inventory, meaning you counted all your products, but you have the option to do a partial inventory.
What is a partial inventory session?
Partial inventory is when you count some but not all of your products in all locations. Typically these will be items that are more high volume you might want to check once a week rather than monthly.
When you end an inventory session, if it was a partial session, then only the counts for the items entered will be updated, all others will not be affected. If you are out of an item you should enter 0 in at least one location so the quantity is set to 0 and Backbar knows you are out of the item.
For a partial inventory session, you want to make sure the Partial Inventory box is checked to not affect your other items.
What is a full inventory session?
A full inventory session is when you count all of your items in all of your locations. In a full inventory session, Backbar assumes you have counted all your inventory so if an item is left blank, it is assumed the count is 0 and you no longer have the item.
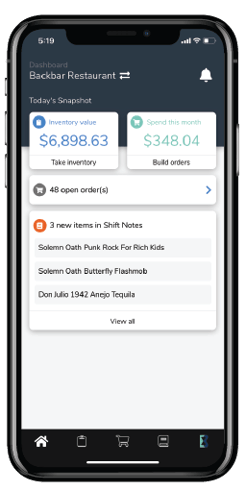
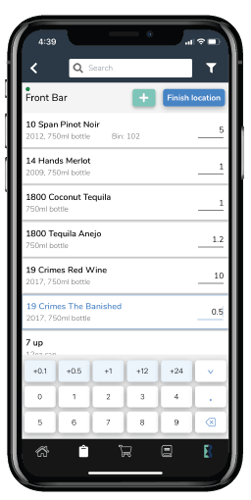
Taking Inventory on Mobile
The dashboard on mobile looks slightly different than the desktop version but provides you with the same functionality. Once you’ve logged in and chosen your location you can begin to take inventory or view current inventory.
Once you’ve added everything you need, just like the desktop version, you can hit Finish Location and end your session.
Invite Users and Staff
Backbar allows you to share access with other staff members by setting roles as admin or manager.
As an admin you have full access to all functionality including: all organization locations, you can invite and set permission for other users and can access plan and billing information if applicable.
As a manager, you have full access to all functionality and can invite users to the same locations they also have access to. Billing and access plan cannot be accessed.
You can also add your staff of servers and bartenders and there they can access materials to new products, tasting notes, and keeping them up-to-date on product changes by using the Shift Notes section on the app.

Interested In Bar and Restaurant Tech and Apps?
Popular POS Systems | Resturant Inventory | Best Staffing & Scheduling Software |


